Monday, 9 July 2012

Selfridges Big Beauty Bang Haul

A few weeks ago now I blogged about Selfridges jubilee celebrations, and more specifically their Big Beauty Bang. That wasn't a sceduled post, it went up straight away so that people would know and could get tickets to the second event a week later. I only bought 3 items on the night, but they were quite big purchases so I wanted to do a haul post for them!

The first thing I bought was this beautiful Neutral Palette from Illamasqua. (£30, here)

The colour in the top right hand corner is so pretty, it's like antiqued gold, it's called Vintage and is the only colour in the palette that isn't matte.

Next up we headed over to MAC where I picked up a matte eyeshadow in Omega (£12, here) to use for my brows. It's the perfect colour for my virtually invisible blonde brows, because it's not too dark and has absolutely no red tones, which was the problem I was finding with my other brow products; they were just too red.

I got a lipstick too, also from MAC. I've actually been wanting this for quite a while but it was sold out! It's a creamsheen lipstick in Speak Louder (£13.50, here)
Speak Louder is a warm toned pink with a hint of gold running through it.

Lastly I got a BB cream from Shu Uemura. I'd like to point out that I didn't actually buy this, I won it out of the 'Beauty grabber' machine they had at the event. I didnt know what I was going to get but having had this for a while I love it! It's the UV Underbase BB Mousse.


Thursday, 5 July 2012

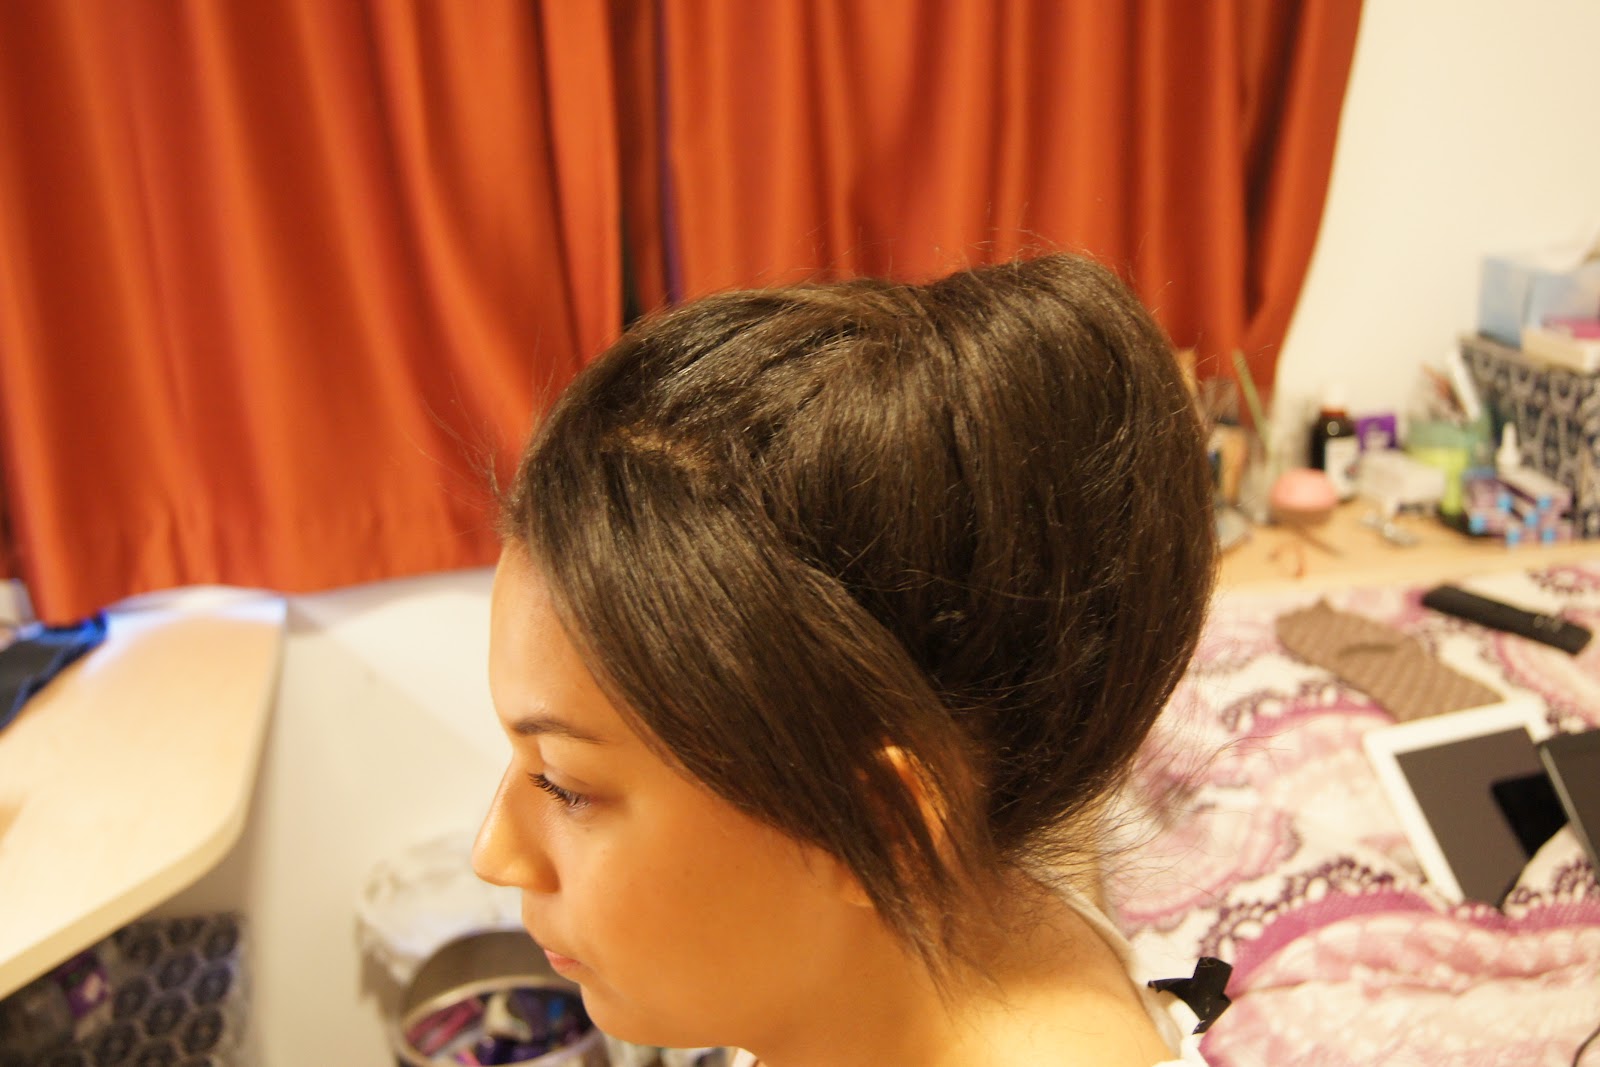
Hair Series: Spin Pin/ Primark Spiral Pins Topknot

When I'm busy doing something, like taking notes in a lecture or bloogging, I always want to keep my hair out of my face. This is a cute a simple style that you can use to pull all of your hair back so it isn't in your face, or you can leave some bits down at the sides and front, and leave it looking a bit messier. You can do this look with normal pins very easily, but I wanted to show how these spiral pins are used.

Again, thankyou to Leonie for lending me her hair for this post!

For this look all you need is your spiral pins (£1 from Primark, for 2) or Goody Spin Pin (£5.50 for 2, here), and a brush. I use a Tangle Teezer (£10.99, here) but any brush will do.


The first thing you need to do is brush your hair out, and then pull it into a high ponytail, using a brush to keep your hair sleek and to make sure there are no bumps. If you are going for a more relaxed, messy look then you can just pull it back with your fingers.

Twist the hair firmly at the base, to anchor it in place. Twist the remainder of the ponytail and wrap it around the base until it is all used up. Tuck the end of the ponytail underneath the bun.
Grab one of your pins, and literally screw it into the bun from the side closest to your neck. You will get a much more firm hold if you push down on the top of the bun as you do this, and try and keep the pin as close to your scalp as possible. Screw the other pin in from the side closest to your forehead, again pressing down on the top of the bun. They warn you on the packaging not to interlock the two pins, as it will tangle your hair, but when I interlocked them accidently nothing bad happened, they just unscrew the same as before!
And you're done! You could spray some hairspray on your hands and use them to smoothe any flyaways that you might have if you need to.


Monday, 2 July 2012

Hair Series: One Pin French Twist


This is a great style to master, it looks good for formal occasions, and you only need one pin to secure it, and it's really secure. Although it looks really formal, it's also useful because it gets all of your hair out of your face really quickly. I wore this style quite a lot in Uganda last year, even trekking through the jungle! (see proof below!)
The first thing you need to do for this style is gather your hair at the nape of your neck.

Twist it through a full turn, tightly, to anchor it in place

Flip the hair over so that the ends of your hair are pointing up.
Twist the ponytail tightly, still holding it up
Spread the looser hair around the bottom of the twist out, so that the twist is covered up to your crown


Fold the ponytail in half (if your hair is long you might need to do it in thirds, or even in half twice) and tuck it under the twist

Grab an open hair pin, and push it into the twist, following the direction of the hair.

Hold the curved part of the pin, and push it around and under the twist. This should hold the style really securely.
Push the pin all the way in, and you're done!


Thursday, 28 June 2012

Hair Series: Ladder Braid

This style is really nice for summer, and it's also great for disguising second day hair. I'll be in Uganda when this is published and will probably be wearing this quite a lot!

In order to recreate this, you do need to be able to do a simple French braid. If you can Dutch braid, then that will work too, though it will give a slightly different look.

start with a small section of hair over one temple. Braid/plait it normally through 2 cycles.
Start French braiding along the hair line, untill you reach the ear.

Once you get to the ear, the braid will be converted into what's called a half laced French braid, but very loosely. The way you do this is by adding hair as you normally would in a French braid to the side of the braid opposite the ear, but braiding normally and not adding any hair to the side nearest the ear. It's important to keep the sections loose as you add them, or the braid will start to wrap around the head, and you are aiming for the braid to fall straight down over the shoulder.  
Secure the end of the braid with a clear elastic, and then use your fingers to pull it outwards, making it wider and a bit messy. You can do this all the way up the head, back to the start point, for a really dressed-down look.


Monday, 25 June 2012

Hair Series: Hair Up, No Pins or Bands

I have been wanting to do a hair series for a while, as I love coming up with different styles, but styling your own hair and taking pictures of it at the same time was virtually impossible! Thankfully my lovely friend Leonie let me borrow her hair so that I could get some decent step-by-step shots

Anyway, onto the style! I quite often need to get my hair out of my face, but don't have anything to secure it with. This style is something I just tried once when I was learning how to create a french twist, and I have been using it since! It's super useful and unusual, people are constantly asking me how to do it, so I thought I'd share.

The first thing you need to do is gather your hair in a ponytail fairly high on your head. You can do this at virtually any height but I think higher tends to look better.


Twist the hair, and wrap it around itsself into a bun. It doesn't matter if it isn't neat, or if you have layers that stick out, as this is all going to get tucked underneath. The most important thing at this point is to make sure that there is a fairly equal amount of hair on each side.

Now comes the hard to explain and hard to photograph part! Holding onto the bun, use two fingers to make a hole above it. When I'm doing this on myself, I keep my wrists together underneath the bun, pointing towards my neck, and then my hands cup it and make the hole at the front, towards my forehead. To give you an idea of perspective as this photo is at something of an awkward angle, the little bit of skin you can see in the bottom corner is Leonie's temple.
Now, holding the hole open, use the heels of your hands to push the bun up and over into the hole. This can pull a little bit, but it gets easier (and less painful!) with practise.
Push any loose strands down into the hole, and if you need to make it more secure, you can roll more hair inwards into the hole.


I hope that I explained everything enough! If you just start experimenting it might start to make more sense!

Thursday, 21 June 2012

Nailed: French Gradient with Tutorial

Today I decided to do something a little bit different with my nails. I like the classic french manicure but I sometimes think it can look a little bit too prefect, and I know a lot of people think it can look tacky (though personally I like it!). This look is softer and is inherently easier than doing your own french manicure as well!

The steps are really very easy, but I'll go through them anyway. You're going to need a nude nail polish, I used Maybelline Everstrong in Ivory Rose (£4.09, here), a base coat, I used Save the Nail Repair and Rescue Base coat as my nails are quite weak (£7.50, here), a french white polish, I'm using Collection 2000 French Manicure in French White (£2.99, availbile from Boots and Superdrug, but irritatingly not online) and a topcoat. I'm using Seche Vite Dry Fast Topcoat (£10.50, here), a nail file and/or buffer, a makeup sponge and some sort of non-porus surface, I just use old packaging.

The first step is to prep your nails. File them into a shape you like, and then I always use a nail buffer to give a smoother finish, but you could skip this. Apply your base coat.

 Apply your nude polish, using enough coats for it to be opaque, though if your nail line shows it doesn't matter too much.

Once that is completely dry, you need to pour out a little bit of your nude polish onto the plastic. Dip the edge of your sponge into it and then dab it off on a clean part of the plastic. If the sponge is too wet you wont get a nice gradient, just a harsh white patch, so this bit is important! Start to stipple the sponge onto the tips of your nails. concentrate on getting a subtle wash of colour at this stage, and dont worry if your tips aren't completely white yet. Once you have done this on all 10 fingers, you can go back and use the sponge just on the very ends of your nails to make the tips fully white. Apply your topcoat and you're good to go!

Using a matte topcoat can make the gradient even more fuzzy and soft looking, it's a really pretty effect.

Monday, 18 June 2012

Maybelline SuperStay 10h Tint Gloss Review

To forewarn; this is a scheduled post written a few weeks ago as I am currently teaching in Uganda. You can read about that adventure here

A few weeks ago I saw a video by FleurDeForce raving about the YSL Glossy Stains. I was really intrigued and desperately wanted to buy one several. However, being a student broke, I couldn't afford to drop £22.50 on one lip product. Then I saw an advert for Maybelline Tint Gloss, and a lightbulb went off in my head. I don't think their similarity is a coincidence!!

I have the shade Lasting Pink, which looks like a bright fuschia pink in the tube, but comes off more red on the lips.


The applicator for this gloss is really interesting and well designed, it is a loop rather than the standard doe-foot applicator, which pulls more product out of the tube, and distributes it more easily than a doe-foot too. More gloss wands like this please!!

When I applied this, I took Fleurs application tips into account, despite that fact this is a different product. I applied one coat which I buffed into my lips, and then another to give a glossy, even finish. I have included a lip swatch because the colour is quite different on the lips than on my arm, though my mouth looks like it belongs to an 80 year old lady in all the pictures, so please ignore that!! (and the two dark spots are lip freckles, they're wierd, I know.)


This lasted a fair few hours, and was not at all drying like a lot of lip stains are. I don't think it really lives up to its claim of being bright and glossy for ten whole hours, but it lasted a lot longer than a regular gloss. And at just £6.99 (here) I think I can live with needing to touch up.

I originally swatched this on my arm, planning to see if it remained after 10 hours. The problem is, I only decided to do this at about 9pm, so there was quite a high risk of me being asleep at the 10 hour mark, and of my getting bright pink stain on my bedding. Needless to say I removed it well before the 10 hours were up. Check out the swatch anyway though, as the colour is quite different to on the lips. Something to bear in mind when purchasing!


The bottom line? Totally reccomend. Great for summer!